Saturday, June 30, 2012

Mrs. Bunny Sigma Brushes Review


When last christmas came around I already had know for nearly a year that my present was to be a Sigma brush kit and when the Mrs. Bunny kit came around these pretty colors definitely sold me on it. I absolutely love these brushes! They have completely changed what makeup application means to me. These brushes are 100% vegan and utilize Sigmax HD fibers, which basically means that they aren’t real hairs they so they don’t absorb the products and help your makeup glide on smoothly giving that flawless look we all want. These brushes being synthetic also makes them softer than real hair.
---------------------------------------------------------------------------------------------------------
Al acercarse la navidad pasada ya yo sabía por adelantado que mi regalo sería un kit de brochas de Sigma y cuando el kit de Mrs. Bunny estrenó los hermosos colores me convencieron que ese sería. Amo esta brochas! Han cambiado del cielo a la tierra el proceso de aplicación de maquillaje para mi. Estas brochas son estrictamente vegetarianas y utilizan fibras Sigmax Hd, lo que significa que como no son cabellos naturales no absorberán productos lo que ayuda a que el maquillaje aplique mejor, mas perfecto y natural. El hecho de que las brochas sean sintéticas también aporta a que sean mas suaves que pelo natural.

First of all, I love this brush holder case which is perfect for travel. My college is two hours from my home, so I tend to head home a lot for the weekend and this holder makes it easy to transport my brushes safely. It being my favorite color also makes it that much better.
---------------------------------------------------------------------------------------------------------
Primero que todo, me fascina este estuche que es perfecto para viajes. Mi universidad está a dos horas de mi casa, así que suelo pasar muchos fin de semanas en mi hogar y este estuche me permite transportar mis brochas con seguridad. El hecho de que es mi color favorito lo hace mil veces mejor.

As you can see the travel case can serve as brush holders when open. What I like to do is use one for dirty brushes and the other for clean. This collection is the vegan equivalent of Sigma’s essential kit which come with 12 brushes. These twelve brushes are more than enough to create any makeup look desired, they are:
---------------------------------------------------------------------------------------------------------
Como pueden ver el estuche cuando abierto sirve de porta-brochas. Lo que a mi me gusta hacer es usar un lado para las brochas sucias y el otro para las limpias. Esta colección es el equivalente vegetariano a el kit Essencial de Sigma que viene con 12 brochas. Estas doce brochas son más que suficiente para crear cualquier maquillaje que desees, son:
  1. The Large Powder - F30
  2. Large Angled Contour - F40
  3. Duo Fiber - F50
  4. Foundation - F60
  5. Concealer - F70
  6. Tapered Blending - E40
  7. Large Shader - E60
  8. Medium Angled Shading - E70
  9. Eye Shading - E55
  10. Small Angle - E65
  11. Pencil - E30
  12. Eye Liner - E05
I love the holographic engraving! / Me encanta la letra holográfica!
These are great quality brushes are definitely worth the price and the investment because, if taken care of, they will last years. Sigma has many collections to chose from and they are available online here. This same collection also comes in black for all you more classic beauties. I am sucker for pretty colors and I must admit I enjoy looking at them sitting on my vanity. They also have a travel kit as part of this vegan collection. I will surely keep purchasing brushes from them over the years.
---------------------------------------------------------------------------------------------------------
Las brochas son de excelente calidad, definitivamente valen el precio y la inversión porque si las cuidas bien te duraran años. Sigma tiene muchas colecciones de las cuales pueden escoger y están disponibles en línea aquí. Esta misma colección también está disponible en negro para todas esas bellezas clásicas que estén leyendo. Debo admitir que unas de mis cosas preferidas de las brochas es el color y disfruto verlas puestas en mi coqueta. También viene un kit más pequeño para viaje como parte de esta colección estrictamente vegetariana. Definitivamente continuaré añadiendo brochas Sigma a mi colección en los próximos años.


My Sigma Affiliate link!

:) Keymi
P.D. Check out my how-to on cleaning brushes here! For drying your brushes here!
P.D. Mira como yo limpio mis brochas aquí! Como secar tus brochas? Aquí!

Wednesday, June 27, 2012

You Are My Sunshine Nails


I would like to introduce to you all a technique which I have dabbled in before and still don’t quite have the hang on but I thought it was worth while showing it to you all. This technique is great for all of us that do not have a steady hand and all of you who just have given up on doing any free-hand nail art. It is a simple as drawing. All it is is drawing the design you wish on a plastic sandwich bag, peeling off and sticking it on you nail like a sticker.
-------------------------------------------------------------------------------------------------------
Me gustaría presentarles una técnica la cual he utilizado un poco, aunque todavía no la domino, pero que pensé que valdría la pena demostrarles. Esta técnica es perfecta para todo nosotros que no tenemos buen pulso y también para aquellos que simplemente se han rendido en intentar crear arte en sus uñas. Es tan simple como pintar. Solo se trata de pintar el diseño que deseas en tu uña sobre una bolsa plástica (“ziploc”), despegarlo y colocarlo en la uña como una calcomanía.
Excuse the messiness! I was in a hurry! / Perdonen las imperfecciones! Estaba de prisa!

Keep in mind you can draw whatever you wish I just chose to create clouds for my design.
-------------------------------------------------------------------------------------------------------
Mantengan en mente que pueden dibujar lo que desean, yo escogí dibujar nubes para mi diseño.

What I used / Lo que utilicé:
1. One plastic baggie / Una bolsita plástica
2. White Polish / Esmalte blanco (Sinful Colors 101 Snow Me White)
3. Blue Polish / Esmalte Azul (Avon Nailwear Pro in Vintage Blue)
4. Yellow Polish / Esmalte amarillo (Bettina Art Deco Yellow)
5. Top Coat / Capa Final (Revlon Colorstay in 030 Calla Lilly)
All you need to do is draw your desired design on the plastic bag and wait a few hours, preferably overnight to dry completely. You can draw as many details or coats on your design as you wish but make sure that the first coat, which will be the one in contact with the bag, is rather thick, this will make peeling off much easier and ensure that the designs do not suffer any breakage. I also recommend you draw more stickers than needed  just in case you lose some.
 -------------------------------------------------------------------------------------------------------
Todo lo que necesitas hacer es pintar el diseño deseado en la bolsita plástica y esperar unas horas, preferiblemente la noche, para que seque completamente. Se puede dibujar cuantos detalles o capas se deseen sobre la capa base, que es la que estará en contacto con la bolsa, pero se debe asegurar de hacer esta capa base bastante gruesa para que se haga más fácil despegar el diseño de la bolsa. También les recomiendo dibujar mas calcomanías de las necesarias por si alguna se rompe en el proceso de despegarlas.


When the design is fully dried just peel it off, and stick it wherever you wish on your nail. Be aware that wherever you first stick it is where it will stay, after it makes contact with the nails it wont peel off. After you finish your design place a top coat over it to seal everything in. TADA! I wish I had made the clouds smaller for a better design but, oh well!, practice makes perfect!
-------------------------------------------------------------------------------------------------------
Cuando el diseño está completamente seco, despegue y coloque donde desee en la uña. Tenga en cuenta que donde primero lo coloques es donde se quedará y no lo podrás reubicar sin arruinar el diseño. Al terminar con el diseño coloca una capa final sobre él para sellarlo bien. TADA! Debí haber hecho la nubes mas pequeñas para que se viera mejor el diseño pero, la practica hace la perfección!


:) Keymi

P.S. Don't forget to vote for me for Top Latina Blog here.
P.D. No olviden votar por mi para Top Latina Blog aquí.

Sunday, June 24, 2012

My Miracle Hair Product...Proclaim Glossing Polish


I’m going to be sharing with you my most repurchased (though I’ve only repurchased once, I’m counting future purchases too), most loved, holliest of holy grail products that I just couldn’t live without. I seriously mean that I could take not having makeup or nail polishes, but I could not take having to live without this. I’m talking about Proclaim’s Glossing Polish with Olive Oil. I know it might sound like I’m exagerating but you have no idea what I have gone through with my hair and how much finding this product helped.
----------------------------------------------------------------------------------------------------
Voy a estar compartiendo con ustedes el producto más valioso para mi, que compro uno y otra vez, ese producto que simplemente no me puede faltar. Seriamente podría vivir sin mi maquillaje, sin mis esmaltes pero no podría sin esto. Hablo de el abrillantador para el cabello con Aceite de Oliva de Proclaim. Sé que puede sonar como si exagerara pero no tienen idea de los problemas que he tenido con mi pelo y como toparme con este producto me ayudo.


I first came across a good three years ago, when a friend’s mom said her stylist had recommended it for her to promote hair growth and strength. I had been having so many problems with my hair just being brittle and I was actually experiencing noticeable hair loss (I was around 16-17 at the time!) so I decided to give it a try too. 
It didn’t take long for me to fall in love with it. It is formulated with olive oil, vitamin E and silicone and claims to help revive dry, damaged hair, restore moisture balance and add lustrous shine. Well it does just that, it’s made my hair stronger and more moisturized so I don’t have to cut my ends that often because of dryness giving it a real chance to grow. Most days I let my hair air dry which used to mean lots of frizz but this makes my hair look absolutely flowy and shiny without need to do anything to it. 
I apply it to my hair when damp or after I’ve dried it to give back some shine. I had tried these types of serums before but they always left my fine hair looking just that, oily. This is my miracle hair product and I’m just now at my SECOND bottle since I first purchased it three years ago so at $7.99 for a 6oz. bottle that last as long as it does it is a steal! I have been thinking about trying out moroccan oil which I’ve heard wonders about but I just can’t think about loving anything more than this.
----------------------------------------------------------------------------------------------------
La primera vez que me topé con este producto fue hace unos tres años cuando la madre de una de mis amigas me comentó que su estilista se lo había recomendado para promover crecimiento y fortaleza del cabello. Estaba teniendo muchos problemas de fragilidad y pérdida de cabello (solo tenía como 16 o 17 años!) así que decidí que valdría la pena intentarlo. 
No tomó mucho tiempo para enamorarme de el. Esta formulado con aceite de oliva, vitamina E y silicona y alega que ayuda a revivir el cabello reseco y dañado y a hidratar y añadir brillo al cabello. Pues, hace justo eso, a hecho mi cabello mas fuerte y mas humectado así no tengo que preocuparme tanto por puntas resecas que cortar y le doy oportunidad a crecer. La mayoría de los días dejo que mi pelo seque naturalmente, lo que usualmente significaba que se encrespaba, pero esto hace que mi cabello luzca brilloso y fluido sin tener que hacer nada mas con el. 
Lo aplico a mi cabello mojado o después de secar para añadirle el brillo que perdió. Había utilizado este tipo de producto antes pero siempre me dejaban el cabello grasoso y pesado. Este es mi producto milagroso y solo ahora es que voy por mi segundo botella desde que comencé a utilizarlo hace tres años, así que por solo $7.99 por una botella de 6oz., ¡es un éxito! He estado pensando en intentar el tratamiento moroccan oil pero no puedo pensar que haya algo más que me encante tanto.

:) Keymi

P.S. Don't forget to vote for me for Top Latina Blog here.
P.D. No se olviden de votar por mi para Top Latina Blog aqui.

Saturday, June 23, 2012

How to...Clean your brushes.

I must confess, I too am guilty of leaving my makeup brushes without a good cleansing for too long. I know it’s horrible exposing my face to all that bacteria, dirt and dead skin cells. The thing is cleaning them is an easy task but I hate having to wait for them to dry, what if I need them? I haven’t been going out much these days, meaning no need to wear makeup, and my skin has been rebelling on me a bit so today I finally got off my lazy ass and cleaned them. I’m gonna show you the best way I’ve found to clean them and just how easy it is.
-----------------------------------------------------------------------------------------------------------------
Debo confesar que yo también he cometido el error de dejar mis brochas sin lavar por demasiado tiempo. Lo sé es horrible exponer a mi piel a todas esas bacterias, sucio y células muertas. El problema para mi no es lavarlas es el tener que esperar que sequen, ¿y si las necesito? Pues, no he estado saliendo mucho estos días lo que quiere decir que no he estado utilizando mucho maquillaje y mi piel se ha estado rebelando en mi contra un poco así que hoy decidí dejar la flojera y lavarlos. Les voy a enseñar la mejor forma que yo he encontrado para lavarlos y lo fácil que es.
What you will need / Lo que necesitaras:


Now on to cleaning / Ahora a limpiar:


Step 1- Prepare a plate with 50/50 olive oil and anti-bacterial dish soap.
Step 2- Wet your brush so that it is moist but not soaking wet.
Step 4- Pick up some of the soap/olive oil mixture with your brush.
Step 5- Have your water running at a luke-warm temperature.
Step 6- Lather up your brush wiping it on your hand. Rinse out your hand every once in a while and continue lathering up your brush you can see little to no makeup residue coming out of the brush.
Step 7- Rinse the brush under the water avoiding the barrel because if water gets in there it can loosen the glue which holds the bristles. Continues rinsing until the water that leaves your brush when you squeeze it out come out clear.
Step 8- Press the sides of your brush against a towel to remove the excess water, as you do this shape the brush.
Step 9- Lay it down somewhere where there is good airflow (like near a window), but not direct sunlight. Leave it overnight to dry.
Step 10- Repeat with the rest of your brushes.
------------------------------------------------------------------------------------------------------------------
Paso 1- Prepara un plato con una mezcla 50/50 de aceite de oliva y líquido de fregar anti-bacterias.
Paso 2- Humedezca la brocha.
Paso 4- Recoge un poco de la mezcla de aceite de oliva/líquido de fregar con la brocha.
Paso 5- Ten agua tibie corriendo.
Paso 6- Enjuaga la brocha pasándola por tu mano. Enjuaga la mano con agua de vez en cuando y continua enjuagando la brocha hasta que la espuma que proviene de la brocha salga sin residuos de maquillaje.
Paso 7- Enjuaga la brocha bajo el agua asegurando de no mojar el barril porque si se mete agua adentro se puede soltar la pega que sostiene el pelo de la brocha. Continua enjuagando hasta que el agua que se escapa de la brocha salga clara.
Paso 8- Presiona los lados de la brocha contra la toalla para remover el exceso de agua, mientras hagas esto dale forma a la brocha.
Paso 9- Coloque la brocha recostada en algún lugar donde fluya el aire (como cerca de una ventana) pero no directo bajo el sol.
Paso 10- Repita con el resto de las brochas.

The real test is my dense foundation brush. / La verdadera prueba es mi brocha para base.
As you can see it’s rather easy, I’m just lazy. This should be done every 1 to 2 weeks depending on how frequently you use your brushes. Really it probably took you longer to read this post than it will take you to clean the brushes, so no excuses right?
------------------------------------------------------------------------------------------------------------------
Como pueden ver es bastante fácil limpiarlas yo solo soy un poco vaga. Esto se debe hacer de cada semana o dos depende de cuan frecuentemente utilizas tus brochas. En realidad probablemente le tomo mas tiempo leer esto que limpiar las brochas, así que ya no deberían haber excusas.

:) Keymi

P.S. A review on my now cleaned Sigma brushes! How to dry your brushes? Here!
P.D. Una reseña sobre mis recién lavadas brochas Sigma! Como secar tus brochas? Aquí!

My Sigma Affiliate link!


Friday, June 22, 2012

Thursday, June 21, 2012

Rimmel Sexy Curves Review / Fav Mascara Combo


Today I will be raving about my current favorite mascara/mascara combo. I’m talking about Rimmel’s Sexy Curves Mascara. I picked this up a good while ago on a whim because Rimmel was %40 or maybe even %50 off, I don’t quite remember, at my local Walgreens. This mascara claims to give you 70% curlier and 7x fuller lashes, all of this with a 12 hour hold. It also claims to strengthen your lashes over time for a lash boosting effect (read complete claim here).
------------------------------------------------------------------------------------------------------------------
Hoy les hablaré un poco sobre la mascara y la combinación de mascaras que me tiene enamorada actualmente. Hablo sobre la Sexy Curves mascara de Rimmel. Un día que Rimmel estaba a %40 o %50, no estoy muy segura, de descuento en Walgreens y decidí comprarlo solo porque sí. Rimmel alega que esta mascara te dará pestañas %70 más rizadas y 7 veces más rellenas, todo esto con una capacidad de sostenerse por 12 horas. También alega que fortalece tus pestañas con el tiempo para un efecto estimulante a las pestañas.

Rimmel Sexy Curves Mascara in 003 Extreme Black


First of all, I love the bright purple packaging just like I like their similar moisture renew lipstick packaging. The formula is not overly dry or too wet like you would get if it was a Loreal mascara, so I find that you get the perfect effect out of a freshly open tube and there is no need to let it dry out a bit like I’ve had to do with some mascaras before. I must admit, I don’t get the purpose of the strangely looking brush, but it really doesn’t do anything negative for it, it doesn’t make it awkward to put on or makes it difficult to coat all your lashes. The brush is flexible and I like that it has short rubber bristles which work well at coating and separating nicely my lashes. But here goes the reason which makes me love this mascara the most, it definitely lifts and curls my lashes beautifully, not to mention it holds the curve amazingly! By amazingly I mean ALL day. I’m not claiming it gives me perfect lashes, because it does leave me a little to want in the fullness department but it gives me beautiful slightly longer than natural lashes for everyday.
------------------------------------------------------------------------------------------------------------------
Primero que todo me encanta el empaque violeta como el de sus pintalabios de la linea moisture renew. La fórmula de la mascara no es ni muy seca ni muy húmeda como he experimentado antes con algunas mascaras de Loreal, así que obtienes el efecto perfecto de un tubo acabado de abrir sin la necesidad de dejar que seque un poco antes de utilizarla. Tengo que admitir que no entiendo el objetivo de la forma extraña del aplicador pero no otorga nada negativo a la mascara ya que no hace extraña o difícil la aplicación. Pero ahora, la razón principal por la cual me encanta esta mascara, ¡levanta y riza mis pestañas muy bien y aguanta el rizo increíblemente! Al decir increíble me refiero que por el día COMPLETO. No estoy diciendo que me da las pestañas perfectas porque me deja algo que desear en el departamento de volumen, pero me da una pestañas un poquito mas largas de lo natural y hermosas para uso diario.

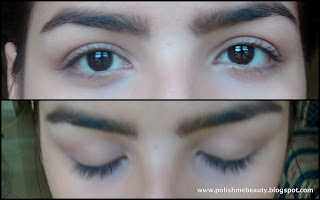
My lashes without any mascara.
My Lashes with Rimmel Sexy Curves
I mentioned that it does leave a little to want in the fullness department and my solution for that has become my favorite mascara combo. After applying two coats of my Sexy Curves mascara I like to apply one coat of Covergirl’s Lash Blast Volume mascara. This combination gives me the most amazing lashes mascara has ever given me, if Rimmel Sexy Curves wasn’t enough reason to rave for THIS combo definately is! Lash Blast Volume gives me the volume Sexy Curves is missing and with three coats of mascara my lashes don’t droop or feel stiff. Did I already say I love these together!?
------------------------------------------------------------------------------------------------------------------
Mencioné que la mascara le falta algo con respecto al volumen que otorga y mi solución para esa falla se ha convertido en mi combinación favorita de mascaras. Después de aplicar dos capas de Sexy Curves me gusta aplicar una capa más de la mascara Lash Blast Volume de Covergirl. Esta combinación me da las pestañas más increíbles que me ha dado una mascara en mi vida! Si Sexy Curves no era mascara suficiente para poner por la nubes esta combinación definitivamente lo es! Lash Blast Volume otorga el volumen que le falta a Sexy Curves y con tres capas de mascara mis pestañas no decaen o se sienten rígidas. ¿¡Ya les dije que me encanta esta combinación?!

My lashes with two coats Sexy Curves and one coat Lash Blast Volume
:) Keymi


P.S. It would mean the world to me if you could vote for me for Top Latina Blogs, just click the link in the sidebar. 
P.D. Significaría mucho para mi si votaran por mi para Top Latina Blogs, solo dale un click al link que ven en el blog.

Tuesday, June 19, 2012

Watermelon Inspired Nails


I’m all about summer colors these days and today I was inspired by some cooling watermelon colors. I had something along the lines of this in my head for a while and I really liked the contrast between matte and shiny. I hope you like it too!
-----------------------------------------------------------------------------------------------------------------
Estos días para mi han sido todo sobre colores veraniegos y hoy mi inspiración fueron los colores de la sandía. En estos días había tenido en mente algo como esto y en realidad me gustó bastante el contraste entre matte y brillo. Espero que les guste a ustedes también!

Here's what I used (From left to right) / Aquí lo sue utilizé (de izquierda a derecha) :
1. Sally Hansen Extreme Wear in 02 Green With Envy
2. Milani in 84 Green Glow
3. Elf Matte Finisher
4. Sinful Colors in 314 Beautiful Girl
5. Kiss Nail Art Paint

Step 1- Base Coat
Step 2- Paint your nails a base color of green (Green with Envy) which will be your matte color.
Step 3- Paint 1/3 of your nail with the another green color (Green Glow) which will remain with shine.
Step 4- Create four dots reducing in size on the side which shall be matte.
Step 5- Place the matte topcoat over the side on which you have created the dots.
Step 6- Create the pink stripe that separates both sides.
Step 7- Place a normal top coat on the side without the dots making sure to include the stripe.
-----------------------------------------------------------------------------------------------------------------
Paso 1- Base
Paso 2- Pinta tus uñas un color base de verde (Green with Envy) que será tu color matte.
Paso 3- Pinta 1/3 de tu uña con otro tono de verde (Green Glow) que será el que se mantendrá con brillo.
Paso 4- Crea cuatro puntos de grande a pequeño en el lado que será matte.
Paso 5- Coloca una mano del color matte sobre el lado donde pintaste los puntos.
Paso 6- Crea una línea separando los dos lados con el color rosado.
Paso 7- Coloca una capa final normal en el lado donde no están los puntos.
:) Keymi

P.S. If you could think of a better name for these nails please let me know!
P.D. Si se les ocurre un mejor título para estas uñas déjenme saber!

Monday, June 18, 2012

Revlon Smoky Shadow Stick Review


Today’s featured product is Revlon’s Colorstay Smoky Shadow Stick in 201 Torch. This is yet another of revlon’s newest products which I just knew I had to try out. Like most of the stuff I try out I only picked up one of it since my budget is pretty limited (damn college life!), and I decided for this one in Torch which just seemed more my type of neutral colors.
-----------------------------------------------------------------------------------------------------------------
El producto de hoy es la nueva sombra para párpados en barra efecto ahumado de Revlon en el color Torch. Este es solo uno de los nuevos productos de Revlon que tenía que probar. Como la mayoría de productos nuevos que pruebo solo pude comprar uno ya que mi presupuesto es un poco limitado (¡maldita vida de universitario!) y me decidí por este en Torch.


Revlon Smoky Shadow Stick in 201 Torch
This one in particular is a combination of light pink/dark brown. They are both extremely pigmented and slightly frosty. The pink is a wonderful champagne-y color and the brown is incredibly rich. They apply smoothly and blend effortlessly though you have to be careful not to blend too much or the color can disappear on you. Once you apply it you should not take long to blend because when it sets it will not budge which makes this product great to be used not only as a shadow but as a shadow base. 
------------------------------------------------------------------------------------------------------------------
Este en particular es una combinación de rosa claro/marrón oscuro. Ambos tienen buena pigmentación y un poco de escarcha. El rosa es un color medio champaña y el marrón es muy saturado y rico. Aplican lisos y son fácil de combinar pero hay que tener cuidado de no difuminar demasiado porque el color puede desaparecer. Después de aplicado no puedes esperar demasiado en difuminarlo porque cuando se fija el color no se va a mover de ahí. Estas cualidades hacen de este producto no solo una buena sombra pero una buena base para sombra.


However there was something that disappointed me about this product, as you can see in the swatches the colors are beautiful but the pink doesn't translate as well on my eyelids. I guess this is just because of my coloring and being that the color is not that intense, but the brown color shows up wonderfully. I do really like the product though it’s not really my cup of tea. I will use it because I like it, but given the rest of the colors I have to choose from I don’t think I’ll feel the need to pick up any more. I’m so excited about all these new products from Revlon and to keep trying more!
------------------------------------------------------------------------------------------------------------------
Sin embargo hubo algo que me decepcionó un poco de este producto, como pueden ver las muestras de colores se ven hermosas pero el rosa no luce igual en mis párpados. Entiendo que esto es por mi color y que el rosa en sí no es muy intenso pero el marrón oscuro luce increíble. Me gustó mucho el producto aunque en realidad no es lo mío. Lo continuaré utilizando porque me gusta pero dado los colores que tengo para escoger no creo que sienta la necesidad de obtener alguno otro. ¡Estoy tan emocionada con estos nuevos productos de Revlon y con continuar probando más!

:) Keymi

P.S. Anything more you want to know!? Ask in the comment below!
P.D Algo más que quisieras saber?! Pregunta en los comentarios abajo!

Sunday, June 17, 2012

FOTD Father's Day Edition!


Happy Father’s Day! I know I’ve been MIA this week but I’ve been in the process of fixing up my new college apartment and a couple other things. All in all it’s been a pretty busy week, I’m exhausted and I just haven’t been able to find the time to sit down and write something. This is not to say I haven’t thought about it and have a couple ideas lined up so this week you’ll be seeing quite a bit of me.
What better way to kick things off again than with my first Face of the Day, Father’s Day Edition? It has been SOOOOO hot here in  Puerto Rico and for just a small family dinner I kept my makeup to a minimum.
--------------------------------------------------------------------------------------------------------------
Feliz Día de los Padres! Se que he estado un poco perdida esta semana pero he estado preparando un nuevo apartamento mas unas cositas mas. Entre todo he estado bastante ocupada, estoy exhausta y simplemente no he podido encontrar el tiempo para sentarme a escribir. Sin embargo las ideas no han dejado de surgir o sea que tengo un par de cositas pendientes para esta semana.
Que mejor forma de arrancar de nuevo que con mi primera Cara del Día, edición del día de los padres? Ha estado tan caliente en Puerto Rico y para solo una pequeña cena familiar decidí reducir el maquillaje a lo mínimo.


What I used / Lo que utilize:
  1. Revlon Colorstay Foundation in 330 Natural Tan (A really light coat / Apliqué muy poco)
  2. Benefit Erase Paste in No.2 Medium
  3. Maybelline Dream Matte Powder in Honey
  4. Revlon Photoready Cream Blush in Coral Reef (review / reseña)
  5. Maybelline Mastershape Eye Brow Pencil in Soft Brown
  6. Maybelline Expert Wear Eye Shadow Quad in Chai Latte (Gold in the lid, dark brown in the crease / Dorado en el párpado y marrón oscuro en el pliegue)
  7. Maybelline Line Stilleto Liquid Eyeliner in Blackest Black
  8. Elf Contouring Blush & Bronzing Powder (Bronzer / Bronceador)
  9. Rimmel Sexy Curves Mascara in Extreme Black
  10. Covergirl Lash Blast Volume Mascara in Very Black
  11. Revlon Super Lustrous Lipstick in Coralberry 674
  12. Revlon Colorburst Lipgloss in 002 Crystal Lilac
Once again Happy Father’s Day to all, I hope you has a warm and cozy day with your family. Go hug that man that has given his all for you and for those of you who can’t, send it to him, he’ll get it somehow! :)
---------------------------------------------------------------------------------------------------------
Feliz Día de los Padres a todos nuevamente, espero que hayan pasado un día cálido y cariñoso con su familia. Vé y abraza a ese hombre que ha dado su todo por ti y para ustedes que no pueden, envíenlo que se que lo recibirá de alguna manera! :)

:)Keymi


Tuesday, June 12, 2012

Sky Ablaze


I went bared-nailed for two days because I was totally without inspiration. Finally today I just sat down with my polishes and decided I wanted to something sunset/sky inspired and so I came up with this. Hope you like!
------------------------------------------------------------------------------------------------------------
Estuve sin nada en las uñas por dos días porque estaba sin inspiración alguna. Finalmente hoy me senté con mis esmaltes y decidí que quería algo inspirado en un atardecer/cielo y es así que surgió este diseño. Espero los guste!

Colors I Uses (From left to right) / Colores sue Utilize (De izquierda a derecha)
1. Bettina Candy Grape
2. Sally Hansen Extreme Wear in 150 Sun Kissed
3. Bettina in Art Deco Yellow


Step 1- Base Coat
Step 2- Paint all your nails a nice sky blue.
Step 3 - Place a drop of orange polish on a piece of paper and take out a toothpick.
Step 4 - Place a drop of yellow polish on a corner of your nail.
Step 5 - Take some orange polish on the tip of your toothpick place it on the center of the yellow drop and drag out. Do this various time picking up more orange polish as needed until you get the desired look.
Step 6 - Top Coat it!
------------------------------------------------------------------------------------------------------------
Paso 1- Base
Paso 2 - Pinta tus uñas un color azul cielo.
Paso 3 - Coloca una gota de esmalte naranja en un pedazo de papel y saca un palillo de dientes.
Paso 4 - Coloca una gota de esmalte amarillo en una esquina de tu uña.
Paso 5 - Toma un poco del esmalte naranja en la punta del palillo de dientes y colócalo en el centro de la gota amarilla en la uña y arrastra hacia afuera. Repite esto agarrando mas anaranjado hasta que obtengas el efecto deseado.
Paso 6 - Capa Final!

:) Keymi
P.S. Help inspire my next look! Tell me what you like in the comments below.
P.D. Ayuda a inspirar mi próxima arte. Dime lo que te gustaría ver en los comentarios abajo.

Monday, June 11, 2012

I got a Liebster Award! :)

Liebster Award!!!
I was so excited, surprised and honored to be tagged by Faux Guru! Thank you so much! 

So... what exactly is the Liebster Award?


The Liebster Blog Award is given to upcoming bloggers who have less than 200 followers.

The Meaning; Liebster is German and means sweetest, kindest, nicest, dearest, beloved, lovely, kind, pleasant, valued, cute, endearing, and welcome.

The Rules :)

1. Each person must post 11 things about themselves.

2. Answer the questions the tagger has set for you plus create 11 questions for the people you've tagged to answer

3. Choose eleven people and link them in your post.

4. Go to their page and tell them.

5. Remember no tag backs!

11 Things About Me:
  1. I'm in my third year of mechanical engineering.
  2. I play the piano and flute.
  3. I LOVE dogs, I want to just hug them and fill my bed up with them and cuddle cuddle cuddle.
  4. I wanted to be a chef once.
  5. I really enjoy baking.
  6. I have and older brother that speaks about 10 different languages.
  7. Seven is my favorite number. SEVEN. (This is the same as Faux Guru, is that cheating? :P)
  8. I am very very clumsy.
  9. I don't have a steady hand at all, but it doesn't stop me from doing my nail art.
  10. Someday I will learn to scuba dive.
  11. I dream on taking a cruise through the mediterranean.
Questions from Faux Guru ~~


1. If you could choose to be born in any era, which would you choose?
  • I'm kind of in love with the series Mad Men so I guess 1960's America, I love the fashion and the makeup.
2. If you could only shop at one beauty store for the rest of your life, which would it be?
  • This is too hard! I think forever21 it has the most variety.
3. What is a dream of yours?
  • A cruise through the mediterranean <3
4. Everyone loves pancakes! What's your favorite flavor?
  • OMG! I am in love with Ihop's new york cheesecake pancakes!
5. Why did you start blogging?
  • I guess the same reason I start most things I do, I was bored and I said "Why not?", I liked it and I stayed.
6. Would you rather be a talented singer, actor, or dancer?
  • Singer
7. Are you a cheek, eyes, or lips kind of gal?
  • Lips
8.What's your favorite number?
  • The number 7
9. What's your favorite season for style?
  • I like winter, the layering and the boots <3 but I can never wear that with the weather in PR, so I guess spring.
10. Can you make a fishy face?
  • I knew that I could, but I still tried to make sure. :P
11. What color nail polish are you wearing right this very second?
  • You caught me bare-nailed! I haven't decided what I want to do next yet.

Questions for those that I tag!

1. What is you holiest of holy grail product?
2. What do you love most in this world?
3. If you could make one wish what would it be?
4. If you could choose between unlimited budget for shoes, makeup, nail polish or clothes...what would you choose?
5. Why do you wear makeup?
6. What would you do If you knew you could not fail?
7. Do you have a pet?
8. What is the most used piece in your wardrobe?
9. What is you favorite trend for this summer?
10. What is the hardest thing you have ever done?
11. Why did you start your blog?

Here's who I tag for this award!